Photography Basics

Photography Basics
Few things will frustrate you as much as a photographer who begins to take his first steps in digital photography as to see that, those spectacular photographs that you have just taken to the computer and that are so clear on the LCD screen of your camera when you download them to the computer, They are moved and have been ruined.
There is a big mistake made by all photographers who take their first steps, and also many more experienced fans: not holding the camera correctly. The vast majority of sharpness errors in the photographs of these are not the product of problems with the lenses, but rather because of problems when holding the camera when shooting it.
Digital Photography
If you are experiencing this kind of problems or you want to review some concepts about the importance of stability in the photographs, this article is for you. You can not lose this.
Photography Basics
Although there are a lot of factors that influence the sharpness and therefore the quality of your photographs, if your camera is not firm when shooting it, none of the others will make sense.
If you hold your camera in an incorrect way, the probability that your photos will be moved increases considerably and this is not at all pleasant, at least not if we are not trying to convey that feeling.
Both the posture when shooting your camera and the way you hold it will allow you to get the best results. So how to do it correctly?
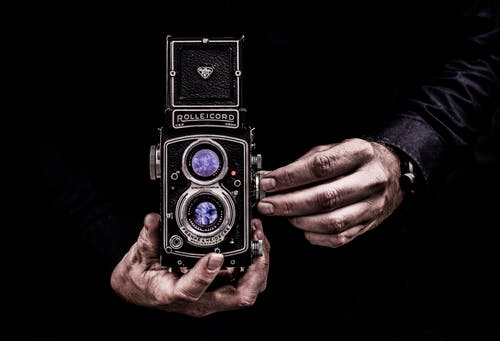
The “best” way to hold the camera is something that has generated, generates and will generate many debates around it. There are many photographers, including many renowned professionals who use both hands to hold the camera and seek to achieve a firm posture that guarantees stability while others do the opposite, are more flexible and use only one hand to shoot their cameras.
Cameras for Photography
There is no single way or method to prevent the photographs you take from moving out of the product of the vibration of the hands when holding it, after all, only you know the way you feel most comfortable when it comes to photographing, even Creating your own style
Anyway, below I will give you a series of guides and tips so you can find the desired stability photo by photo.
Find your own path to stability
KEEP YOUR CAMERA AS FIXED AS POSSIBLE
Your photographs will be moved when, while the shutter of your camera is open allowing the light to reach the sensor, vibrations or movements occur that make the light that is reflected by the objects in the scene, captured by the sensor in different positions.
When there is a lot of light, when the shutter remains very little open time to achieve a correct measurement and exposure of your photographs, the probability that a photo will be moved is much lower. But when the shutter speeds must be slower (darker scenes), the chances of a photo moving out are multiplied.
Photographs
That is why, to prevent these vibrations from ruining your photographs, it is essential that you keep the camera as fixed as possible and this is achieved, transforming your body into a tripod.
Your body, your tripod. Your body, your tripod
THE 3 SUPPORT POINTS: As if trying to emulate the operation of a tripod, the key to properly hold your camera is just that, get 3 points of support (or more if possible) to minimize the possibility that your camera moves from Vertical, horizontal or both.
Camera Position
How to do it with only two arms? While it is true that you only have two arms to hold your camera, do not forget that, if you shoot it through the viewfinder, you can use the contact between it and your eyebrows or forehead as an extra foothold.
In this way, while controlling the camera with your right hand and holding your weight with your left hand, you add stability using your eyebrows or forehead as an extra supportive fucking. Take the test and you’ll see what I’m talking about
Support points: The most important aspect when it comes to achieving stability by shooting your camera without any other support than your own body are, the points of support.
Look at the posture of the following photographer:. Would you have chosen that position?
Would you like such a position? Keep in mind that the “right” ways of holding a camera are not only designed to minimize the possibility of vibrations that can ruin your shots but also, these postures should be comfortable so that you can work naturally in each of your Photos.
In the previous photograph, the only support point he has used on his entire body and therefore on his camera is his feet. His posture is quite unstable and even forced, which increases the chances that, when working uncomfortably, the photos are not completely clear.
At the end of reading this article, go back to this photo and try to imagine what position you would have chosen to do it.
Horizontal Picture
HOLDING THE CAMERA IN HORIZONTAL POSITION
As I just told you, the key to holding your camera is to ensure that it is held as firmly as possible and this will be achieved by maximizing its footholds. Now, you should not only worry about the points of direct contact with your camera (head and hands), but you should also think about how you place your arms, legs, etc. It is not enough to just take the camera firmly, but also, your whole body must enhance this firmness.
When holding your camera horizontally or “regularly” try to make your arms and elbows as close to the body as possible. The support of your camera is your hands and the support of your hands are the arms, so, getting your arms do not move when shooting is as important as correctly holding your camera with your hands.
Photography Basics and Trends
Also, try to use your eyebrows or forehead as an extra foothold, pressing your camera firmly against them so as to achieve that third precious foothold. You can even tilt your head slightly so that in addition to your forehead, you can support your cheekbones or part of your cheeks.
Finally, do not forget that the whole body uses your spine and legs as a support so it tries to stand in a firm but comfortable way. Keep your back straight and legs slightly apart. If necessary, use your knees or even external objects such as a wall or a column to gain greater stability.
Finally, do not forget that the whole body uses your spine and legs as a support so it tries to stand in a firm but comfortable way. Keep your back straight and legs slightly apart. If necessary, use your knees or even external objects such as a wall or a column to gain greater stability.
Horizontal position
The photographs above show with a green arrow the successes of the photographer as to how to hold the camera and his body posture and with a red arrow his “mistakes” or rather, points that could improve in order to gain greater stability.
HOLDING THE CAMERA IN VERTICAL POSITION (PORTRAIT)
Holding the camera vertically is one of the most complicated positions to achieve good stability since your elbows, the right, no longer have contact with the body. In any case, you can increase stability in this position as follows:
Try that the elbow that supports the weight of your camera, that is the left, is even more attached to the body, you can even try to place it almost in the middle of your chest so as to gain even more stability.
You can also choose to place both elbows on your body, that is, holding your camera from below with both hands. Use the technique that is most comfortable for you, but always trying to maximize the support points.
Different ways to shoot vertically. In the following photograph you can see how despite holding the camera in a similar way, even with the naked eye you can see which of both photographers does it in a more firm and stable way:
This type of complications when holding the cameras in one or another position does not usually exist when professional cameras are used, since the most advanced models bring a “grip” that allows the camera to comfortably hold the camera in either of both positions ( horizontal and vertical). If your camera does not bring it, do not worry, almost all models allow you to add this “grip” as an external accessory.
At this point in your photographic history, it’s been a while since you realized that taking a picture is much more complicated than pressing a button. And even more complicated if what you want is more than having a photo; If you want to have a good picture, it really gets complicated.
Although the most normal thing to start with is that the composition hallucinates us, and that we dedicate most of our efforts to it, the truth is that the best way to ruin an image is not through it, not even through Light or theme. Yes, photography is light, but also and above all it is focus.
The focus directs our gaze, tells us what is important in the image, and even in what order and in what line we should look at it. It tells us if that image is transgressive, if it meets the standards, or if that image is simply worth nothing more than to the trash because it is a big mistake. And although it seems a lie, the errors related to the approach are the most recurrent and insurmountable in terms of photographic errors.
WHAT IS THE APPROACH?
According to the RAE (Royal Spanish Academy), focusing is:
“Make the image of an object produced in the focus of a lens clearly collected on a particular plane or object.” Royal Spanish Academy ©
Look at the following image: Sharpness-in-photography-10
We say that Mario is focused, when the image he projects, passes through the lens and joins precisely on the plane of the sensor; Same as in the first image. On the contrary, we say that an image is out of focus, when the image is formed outside the plane of the sensor, either before or after, as you can see very clearly in the second image.
WHAT TYPES OF FOCUS ARE THERE?
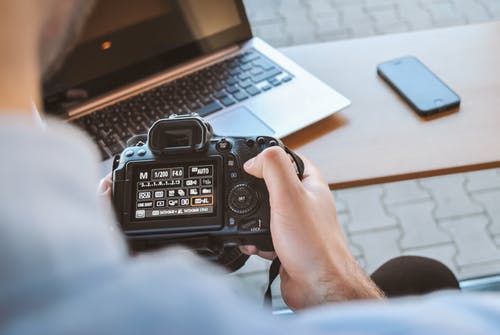
In general, we have two types of approach, each with its own particularities and its applications in specific situations. To change from one to another, you must do it through your objective, moving the M or MF (Manual) button to A or AF (Automatic) or vice versa.
Focus-Objective
MANUAL FOCUS
The manual focus is one in which you must focus manually by turning the focus wheel of your target.
AUTOMATIC FOCUS
It is the one in which your camera focuses automatically. The autofocus is divided into several types:
AF-S, AF-C, AF-A for Nikon or One Shot, AI Servo, AI Focus for Canon.
The differences between them basically lie in the movement or not of the subject or of what we are going to portray:
AF-S or One Shot: When we photograph subjects or static objects, this approach is the most suitable since it is more accurate than other automatic ones. Of course, it is also slower, so it is recommended to use it only in situations where we anticipate that what we are photographing is not going to move.
AF-C or AI Servo: They are used to photograph moving subjects. This system will focus on what moves before the target and will follow up whenever we have the shutter button pressed halfway. Once we decide to take the picture, you just have to press the shutter all the way down.
AF-A or AI Focus: When it is anticipated that a static situation can become a moving one, the use of this mode is the best, since it is capable of moving from a static system to following the moving subject automatically.
FOCUS AREA: WHAT IS IT AND HOW IS IT USED?
The focus area is the area of the image in which we want to place the focus. In general, these are the options that most SLR cameras have regardless of the brand and model.