
A Comprehensive Guide on How to Design a Stunning Photo Collage for Your Wall.
Introduction:
Do you have a blank wall that needs some decoration? Do you want to showcase your favorite memories creatively and stylishly? If yes, then a photo collage is the perfect solution for you! Creating a photo collage for your wall is a fun and easy DIY project that can add a personal touch to your space. However, designing a photo collage can be overwhelming if you need help knowing where to start. That’s why we have compiled a comprehensive guide on designing a photo collage for a wall. In this article, we will walk you through the step-by-step process of designing a stunning photo collage that will transform your wall into a work of art.
Step-by-Step Guide: How to design a photo collage for a wall?
Choose the Wall.
Choose the Wall The first step in designing a photo collage for your wall is to choose the wall where you want to hang it. It could be your living room, bedroom, or any other room in your house. Make sure the wall has enough space to accommodate the size of the photo collage.
Select the Photos.
Select the Photos The next step is to select the photos you want to include in the collage. Choose pictures with a common theme or color scheme to create a cohesive look. You can also mix and match different sizes and shapes of photos to add visual interest to your collage.
Pick a Layout Once.
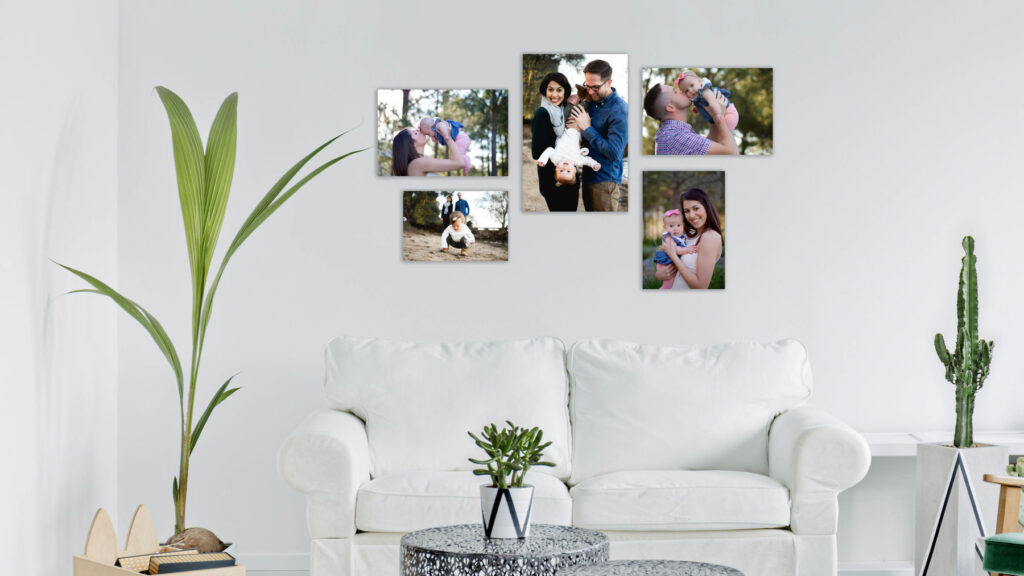
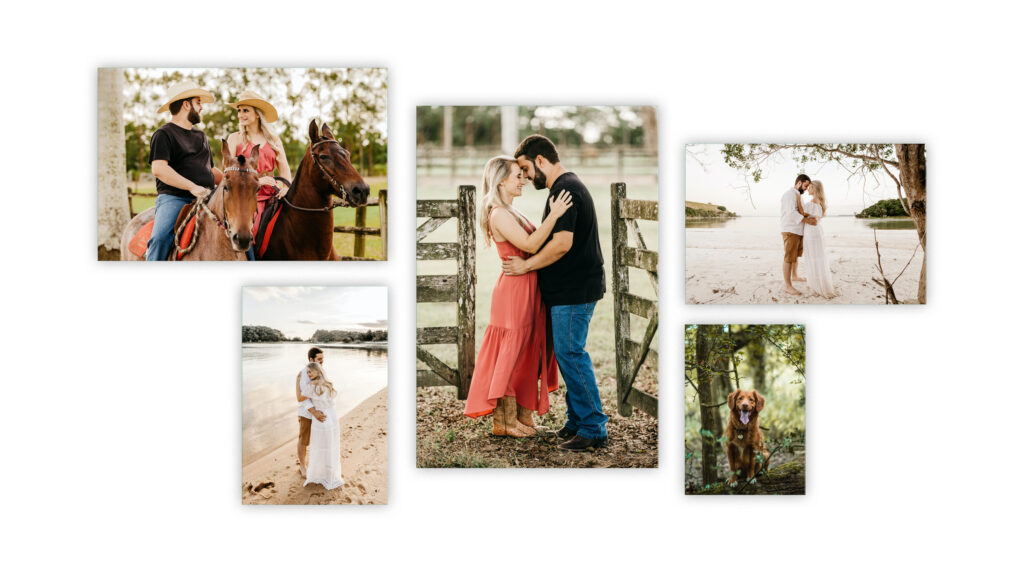
Pick a Layout Once you have selected the photos, the next step is to pick a layout for your collage. There are several layout options, such as a grid layout, a random layout, a heart-shaped layout, or a circular layout. Consider the size and shape of your wall when choosing a layout.
Create a Mock-Up.
Create a Mock-Up Before you start hanging your photos on the wall, creating a mock-up of your collage is a good idea. Use a large sheet of paper or cardboard to create a template for your wall and arrange the photos. This will help you visualize how the collage will look on your wall and make any necessary adjustments.
Hang the Photos.
Hang the Photos Now it’s time to hang them on the wall. Start by measuring and marking the center of the wall, and then work your way outwards. Use a level to ensure your photos are straight, and double-check the spacing between each photo.
Add Some Personal Touches.
Add Some Personal Touches To make your photo collage even more personalized, you can add some decorative touches. For example, you can add a string of fairy lights around the edges of the collage or some stickers or frames to the photos.
Step Back and Admire.
Step Back and Admire Once you have hung all the photos and added any personal touches, step back and admire your work! You have successfully designed a stunning photo collage for your wall that will make a beautiful addition to your home decor.

FAQs:
What is the best size for a photo collage on a wall? There is no one-size-fits-all answer to this question, as it depends on the size of your wall and the number of photos you want to include. However, a good rule of thumb is choosing a proportionate size for the wall and allowing enough space between the photos for visual interest.
Can I mix and match different frame styles in my photo collage? Absolutely! Mixing and matching different frame styles can add visual interest and personality to your photo collage.
How do I ensure my photos are straight when hanging on the wall? Use a level to ensure that your photos are straight. You can also use adhesive strips or hooks with a built-in level to make the process easier.
Can I change the photos in my photo collage over time? Absolutely! One of the benefits of a photo collage is that you can easily switch out the pictures whenever you want to update the look.
How do I choose a color scheme for my photo collage? Consider the colors in the room where you plan to hang the photo collage. You can also choose a color scheme based on the photos you want to include. For example, if you create a vintage look, you could choose photos with a sepia tone.
Conclusion:
Designing a photo collage for your wall is a fun and easy way to add a personal touch to your home decor. By following these simple steps, you can create a stunning photo collage that showcases your favorite memories creatively and stylishly. Remember to choose a wall, select the photos, pick a layout, create a mock-up, hang the pictures, add personal touches, and step back to admire your work! With some creativity and patience, you can design a photo collage that will transform your wall into a work of art.
So, what are you waiting for? Start gathering your favorite photos and start your photo collage project today! With the help of this guide, you can create a beautiful and personalized photo collage that will highlight your home decor.
Author Profile

Latest entries
- December 30, 2023Photo PrintsDigital Art Laminated in Glass or Acrylic: Why Galleries and Artists Prefer the Shimmering Shield
- December 30, 2023Photo PrintsDPReview’s Year in Review
- October 5, 2023Photo PrintsAI Photo and Decoration: The Future of Displaying Memories
- October 5, 2023Photo PrintsHome Decoration: Elevating Interiors with Glass Photo Prints