
Night Photography.
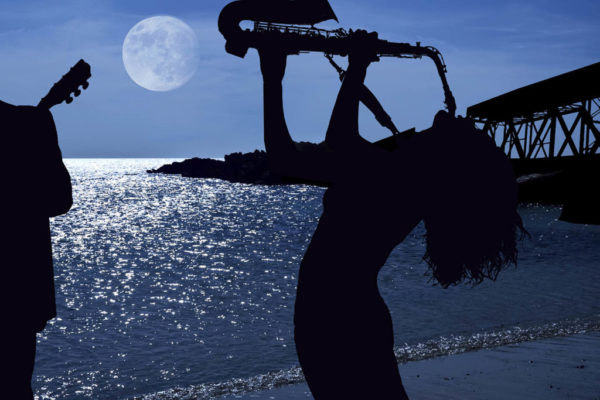
Night photography is the most spectacular photographic discipline. Also, it may be one of the disciplines that most distort reality in some variants since it allows us to capture scenes that the human eye cannot appreciate. I mean to capture the Milky Way in all its splendor (which is not easy at first glance), to see traces of stars or even create unreal circumpolar ones, and to achieve “Martian” landscapes in a terrestrial atmosphere.
It is how beautiful photography is often. That, used judiciously, allows us to alter reality and create worlds, stories, and beauty.
Night Photography Settings
The essential equipment, your two best friends, and a camera with a BULB mode (extended exposure mode) for night photography will be your tripod and a cable or remote release. First, we have to realize that the amount of light is reduced. This implies that we need stability. We recommend a tripod with a certain weight to which you can place a counterweight to eliminate or minimize any possibility of movement.
Also, when shooting directly, pressing the shutter can cause vibrations. To minimize them, in addition to using the option to raise the mirror (if we use an SLR), you can use a trigger cable. Infrared remote triggers sometimes cause problems with bulb mode and only allow controlled exposures for up to 30 seconds, so you should consult the manual for your infrared shutter. This never happens with cable. With one click to fire, you lock the button and wait for the set time. Another click and voila
The desirable thing in terms of the cable is that it be of the intervalometer type (with LCD screen), with a stopwatch to control the time. The second click will be automatic at the programmed time, and the intervalometer button will unlock the camera shutter. You can get by with a simple one without a screen or other options and control the exposure time with your watch or mobile.
In addition to this, once you advance in night photography, the following elements will be helpful:
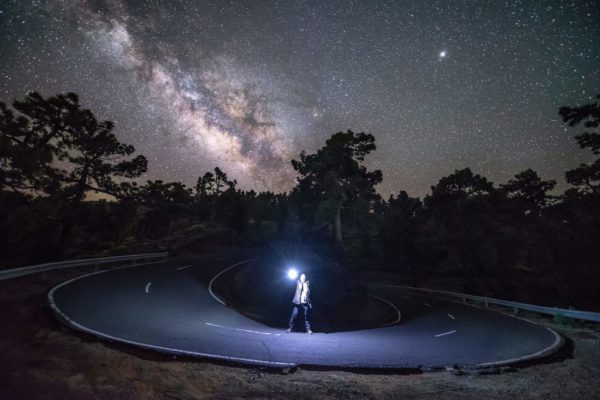
A headlamp: the kind that is placed on the head. Something essential when walking at night. So we will see where we step. I recommended those that also have a red light. The reason is that you can leave that light on while you talk to colleagues.
Mountain boots are recommended to tread well and get into certain places, especially in the field.
Flashes, flashlights, and gels: According to taste and depends on the type of lighting we do. Some night photographs of landscapes do not usually have artificial lighting, but if you want to illuminate nearby objects, it is undoubtedly necessary to use one of these elements.
Rechargeable batteries: Many, many, and well-charged. It’s common to be in the middle of nowhere and run out of batteries. Also, remember that with the cold, especially in winter.
Within the essential equipment, in addition to the previous elements and our camera, we must consider some mobile applications (there are many) that are essential to program our outings and
work on night photography. From those that offer us information about the sunrise and its position, the phases of the moon, or those that help us to calculate the hyperlocal.
Star Photography Settings
Although he is not part of the team, if we are going to do night photography, a recommendation is that we always go with others. Especially if it is in the country (also in the city, to avoid, in that case, possible thefts), keep in mind that in the middle of the field, there is usually little or no mobile coverage. If something happens to you, minimizing the possibilities and having a partner who can help you or notify emergency services is always better.
Twilight (and not the movie) is the interval before sunrise or after sunset, during which the sky appears dimly lit, softly, and where the colors of the sky move away from the usual blue of the day, which in photographic terms, is truly an undiscovered treasure.
This twilight phenomenon occurs by illuminating the upper layers of the atmosphere in a much less perpendicular way. We collect details: When? At sunrise, sunset, or in the so-called “blue hour.”
Use of closed diaphragms: f8, f11 to f22 or f32 (remember that at the extremes f22 or f32 the lenses tend to lower their quality a lot)
We obtain photographs with a great depth of field by using very closed apertures where practically the entire scene is in focus.
If the exposure time is short, a tripod is not usually needed, but as in almost all landscape photography, its use is recommended to minimize possible jitter.
Use of neutral density filters: entire, gradients, and reverse gradients.
The exposure time varies greatly depending on the light since the atmosphere can change quickly.
The lowest possible ISO of the camera is usually used (100 or 200). For the above reason, noise problems do not typically occur.
Yes, night photos in cities. They are different. But at night, everything changes; there are fewer people, and in many places, there are unique lights to make certain monuments or buildings more attractive at night.
When? From dusk, all night, and dawn.
Use closed diaphragms as well: usually between f8 and f16, the latter being a good starting point. We obtain photographs with a great depth of field by using very closed apertures where practically the entire scene is in focus.
Long exposure times (1 “to 30” is typical).Use of neutral density filters to achieve longer exposure times. It is usually easy to focus with autofocus. The lowest possible ISO of the camera is generally used (100 or 200), although in many cases, we can use high ISOs to highlight specific details of the scene.
Night photo
To achieve maximum clarity in our photographs, we must adjust the focus very well, which will be simple enough when we do night photography in the field since the lighting of the urban landscape can even be enough for the autofocus to work correctly. If this is not achieved, it is best to focus manually or use the hyperfocal, which we will see later. If you don’t have much practice on this topic, don’t worry; take a shot focusing on the manual, check the focus, and if it’s not right, try again. Photographing a monument is an excellent situation to practice a manual guide.
The blue hour is no more than the hour before sunrise and the hour before sunset (approximate time intervals), producing an intense blue in the sky. This light has certain peculiarities. For example, during these periods, the natural light is very diffuse, translating into a high quality of lighting in the scene.t.
On the other hand, the situation of the sun concerning the horizon causes a curious physical phenomenon to take place in such a way that spectacular sunrises or sunsets full of warm colors take place. In addition to photographing landscapes in this suggestive light, photographing during these periods is highly appropriate for urban landscapes for a simple reason. And it is then that cities are lit by artificial light from streetlights, buildings, billboards, etc., which mixes natural light with artificial light, being able to capture skies and urban buildings lit simultaneously.
Playing with the color temperature allows us to modify the photograph’s tones. We can boost the oranges by turning up the color temperature with the cloudy preset, which will use a color temperature between 6,000 and 7,000 degrees Kelvin, depending on the camera model. We will use the tungsten preset, 3,200 degrees Kelvin, if we want more bluish tones. Remember that if you work in RAW, you can easily change the temperature in the processing.
Think of a scene in the heart of your cities. Although it is dark at night, we will face an immense legion of lights from streetlights, illuminated posters, or even shop window lights. On these occasions, as we must always do before, considering the scene and the photo we want to take, we know that it will be difficult to compensate for so much light pollution. We can pass the photography to black and white, obtaining high-contrast night scenes.
But what if there was no light pollution? Well, in Engadget Foto, they explain it to us.
We first need to learn how to make a correct measurement. There are quite a few ways to do it. If we are in the countryside, far from the city and with low levels of light pollution, we usually expose, as a general rule, to the sky. We will achieve a correct sky exposure depending on whether we want more or fewer contrails or to show the Milky Way using high ISOs.
Se suelen emplear diafragmas algo más abiertos para capturar más luz (desde f/2.8 a f/8) siendo un buen punto de partida para mucha gente el usar f/5.6.
Se suelen usar focales más angulares para mostrar escenas de forma más amplia (10 a 16mm) pero no es raro tampoco usar focales mayores como 50mm.
In this case, much longer exposure times are usually used when treating at night. We speak from 30 seconds to several minutes, depending on what we seek. This is the case, except in some cases where the moonlight can drastically reduce the exposure time, especially in summer.
Composing is difficult. That’s why I recommend using the highest ISO possible and shooting a multi-second photo to see the composition on the screen. Reset the camera and tripod. Repeat the shot as many times as necessary to achieve a satisfactory arrangement.
The lowest possible ISO (typically 100) is usually used to minimize photo noise. This, however, increases the exposure time, which also causes noise. You typically have to balance the exposure time (it provides the movement of clouds and stars) and the ISO (the higher the noise, the more noise it generates). In-camera noise reduction works by taking a second photograph with the shutter closed and subtracting the so-called hot pixels from the first exposure. This second photo takes the same time as the first to expose, doubling the time we need to take a picture. If you take a five-minute photo until after 10 minutes, the camera will not end, and if you take one for an hour, you have another hour of the camera applying noise reduction.
The noise increases exponentially as we use higher sensitivity values, significantly when we exceed the native modes of the camera’s captor and enter forced values. The noise generated by digital sensors is not always the same since, in reality, it is neither more nor less than that electronic noise interference. It seems logical to think then that if I repeat the shot, I will obtain the same photograph (as long as it is not a static scene, of course) but with a random and different noise each time, although similar in quantity and type, but not the same. You can see the trick in Xataka Foto.
We have not commented on it before in the previous cases, but it is mandatory to shoot in RAW due to the advantages that this format offers in matters, above all, post-processing.
Although the most common is ISO 100, we can work with practically any camera up to ISO 1600 today. To remove the milky way, we must use ISO 1600 or higher.
Measurement is the step that requires more calculations, and we have to be focused on saving time and having only a few wrong tests. In the parameters that determine the measurement, we will bear in mind the following aspects:
ISO sensitivity: the lower, the less noise the photo will have. The recommendation is to work at 100 ISO, but if your camera has a low noise signal and you are in a hurry, you can increase the sensitivity.
Diaphragm: the more open, the shorter the exposure time, and the more stars appear in the photo.
Shutter: we will almost always work in the BULB position to take long exposures. The exposure time will determine whether we have the stars as lines or points. If we want the stars as points, we must apply the following formula to obtain the maximum exposure time: we will divide 500 by the focal length we work, but on the Full Frame scale. If we have a camera with an APS-C sensor and we work with the 18-55mm zoom in the most angular position, which is 18mm, we will multiply 18 by 1.5 (18 × 1.5 = 27) to have the focal length in Full Frame, and we will divide 500 by this amount. The maximum shutter time to avoid moving stars, taking the photo with an 18mm focal length is 500/27 = 18.5 seconds. Full Frame will be the same but without doing the multiplication.
Once we know how the measurement parameters affect our photography, a starting point, when we have moonlight illuminated the elements of our photography, is to do a test with ISO 100, f / 4 aperture, and an exposure time of 500 seconds. But so as not to spend an eternity on seeing if we have succeeded, the best thing is to apply the reciprocity law: we will raise the ISO to the maximum that our camera gives (for example, I will use 3200 ISO) and we will reduce the time by as many steps as ISO steps we have raised. From 100 ISO to 3200 ISO, we have 200, 400, 800, 1600, and 3200 ISO, which are five steps. We reduce the time by five degrees, starting at 500 seconds: 500, 250, 125, 60, 30, and 15 seconds.
Our test measurement is at ISO 3,200, f / 4 aperture, and 15-second exposure time, which allows us to see the results quickly and make the adjustments that interest us. Once done, let’s remember to go down to 100 ISO and do the process in reverse to have the correct exposure time.
Each one must learn to find their light in the dark, as we see here:
In addition to star trails, movement in the clouds, or showing the Milky Way, in long-exposure night photography, we can find circumpolar. A technique that allows, using several captures from the same position and with the same duration, to capture the circular motion of the stars about the Polar Bear, which, as we know, points to the North.
When one starts in photography, especially if one likes landscape photography, one of the biggest mistakes is forgetting the aperture (or even leaving the automatic mode), focusing on infinity and shooting. Come on; we focus on that mountain or tree we see far away.
Thus, usually, what is in the foreground is slightly more out of focus while the background is sharp. Well, this may look good in some photos, but when you begin to understand the composition and how to balance it, you often realize that perhaps the foreground should have the same degree of detail (sharpness) as the background. This usually happens because we think, in the wrong way, that in landscapes, we only look at infinity, at the horizon, at the bottom, in short.
So how can we define the hyperfocal distance? Hyperfocal distance is the minimum distance at which I must focus with my camera under certain focal length and aperture conditions so that the reasonably sensitive area behind the focus point reaches infinity. Thus we will have three variables: camera, focal length, and aperture.
To know the formula, it is this: Hyperfocal distance = focal² / (circle of confusion x F-number).
In addition, it must be considered that the circle of confusion varies depending on the sensor size (full Frame, APS, or CSC, for example).
From the formula, it quickly follows that wide-angle lenses “have” a lot of depth of field, right? The lower the dividend of that formula, the lower its quotient will be.
But if you don’t want to go crazy with math to calculate the depth of field, we can use some tools, like the DOF Calculator, where I get a hyperfocal distance of 0.635m. More precisely: from the middle 0.635m of my camera, it will be perfectly focused when taking the picture. Or, use another Android application by Iván Sánchez “Fusky”, a well-known photographer specializing in nightlife: Hyperfocus. If you use iOS, you can use SetMyCamera.
This is very useful in night photography or low-light conditions. We focus on the hyperfocal distance, and we can leave our focus on manual and forget about autofocus for the rest of the night.
One note, depth of field is not an “absolute value.” It is also related to the output support of the photograph and the distance from which it will be seen. It is different to see the picture from the monitor, on the camera screen, then on a wall at 20x25cm or 100x150cm. The feeling of sharpness will be different in each case.
Light painting means “painting with light.” Etymologically it is the same as the word photography. It draws different shapes with a light source during a long exposure photograph.
The history of Lightpainting dates back to 1914 when Frank Gilbreth and his wife, Lillian Moller Gilbreth, first used small lights to track the movement of their company’s manufacturing process in long exposure photography. Their intention was not to produce the photographs as an artistic activity but to study the possibility of simplifying the work carried out in their company; even so, they had what is known today as the first photograph in which the scene was painted with light.
Later, in 1935, Man Ray was the first artist to explore the Light painting technique. His most significant contribution to this discipline came in his series of photographs: “The writing space.” Man Ray opened the shutter on his camera and used a small flashlight to create a series of swirls and lines in the air.
The impressive thing about this technique is that we can use different lighting and colors to obtain different results. White balance doesn’t matter much anymore. Everything is creativity.
It is advisable to paint light with led flashlights with different colored gels because these create thinner and more precise lines than any other type of flashlight (for example, spheres of light). But any light source will do. They are also widely used: steel wool to create effects such as “sparks of light” or luminous thread.
There is a theme that is quite recurrent in night photography: the ruins. Those of us who like night photography love to photograph ruins. If the long exposure generates in the viewer the idea of movement and the passage of time, in the case of the ruins, this second effect also occurs.
Many online resources exist, such as Uninhabited Towns and an exciting blog. Within our national panorama, one of the most interesting is the town of Belchite, in Zaragoza, totally abandoned and destroyed during the Spanish Civil War, to which the following image belongs.
For this reason, we habitually search for locations such as abandoned hermitages, disused factories, abandoned mills, dry trees in the middle of the field, and any other elements that suggest the passage of time.
There are many ways to calculate the exposure time for night photography. It depends, in each case, on what we want to achieve. One of the simplest ways to a correct exposure to the night sky is the following:
We want to use ISO 100 and f / 5.6, for example. We shoot a photograph at ISO 3200 (usually, we will not exceed 30 “), a little by eye, and” trust “the camera’s exposure meter.
We look at the histogram and see if we have an overshot or fall short. If it is underexposed, we go up to ISO 6400 and test 30 “again. For this example, however, let’s imagine it is correctly exposed to ISO 3200.
To shoot at that ISO 100 without changing the aperture, we must multiply the exposure time by two each time we lower the ISO one step. So at ISO 1600, it would be 1 minute; at ISO 800, it would be 2 minutes; at ISO 400, it would be 4 minutes; at ISO 200, it would be 8 minutes; finally, at ISO 100, it would be 16 minutes of exposure.
Remember that the longer the exposure time, the more the sensor can get hotter. Some old cameras need to be more ready for it.
In general, the exposure time calculation is the same for all types of long-exposure photography, so I recommend you read the Xataka Foto Long Exposure Photography Guide.
Here we could be talking for hours and hours about the subject, in addition to compensating highlights or eliminating dominants. I recommend the following trick. As you have already seen, in long-exposure night photography (the one that usually has the most followers), it is widespread to illuminate using flashlights or flashes.
Sometimes when taking night photography, we have a very typical problem. We cannot illuminate or paint the scene given a specific exposure time, usually because the location is too big. Although we have our army of well-prepared flashes and flashlights, we do not have time to illuminate everything in one shot.
Well, let’s do it in parts. Suppose we have 4 minutes for correct exposure to the sky. We can calmly illuminate the lower leg to make a perfectly lit path. Then, in a second shot, illuminate another area. In a third, the rest. In short, as many times as we need it. We are lighting, which gives us time.
Author Profile
Latest entries
- August 19, 2024Photo PrintsHow to Clean Glass Pictures: Keep Your Memories Sparkling
- August 19, 2024Photo PrintsThe Best Photo Cameras of 2024
- August 19, 2024Photo PrintsAPG Graphics: The Only Company That Laminates Photos on Glass in the USA
- August 19, 2024Photo PrintsThe Best Online Photo Printing Services for 2024